PROTOTYPE- Making Breyer Stable Blanket.
Degree of difficulty- moderate to some.
Tinkering for a few hours with tissue paper and my beloved Breyer Phar Lap, I am trying to make a replica of the real Phar Laps' rug he wore over in the USA. I can't believe after weeks of searching there are absolutely no free patterns available to design a stable blanket.???
I'm not really a very good dress maker, so the very little patterns I have actually done kind of help a little in designing a pattern- oh- don't even ask me about matching plaids or pattern fabrics! I was always a kid who made Barbie clothes by hacking around the original garment on the fabric and going for it! LOL
This is Phar Laps real blanket below.
http://museumvictoria.com.au/melbournemuseum/whatson/current-exhibitions/melbournestory/favourite-objects/phar-laps-rug/
This is my beautiful Boy- [except the real Phar Lap was a gelding!] he is wearing his shin and tendon [a.k.a brush boots] boots that I made the other night, thanks to an old faux leather bag I can recycle the material from.

[ A close up]
Possibly my velcro tabs are a little out on scale but these were my first attempt at a prototype.- ....And I was watching the Titanic at the same time! lol.
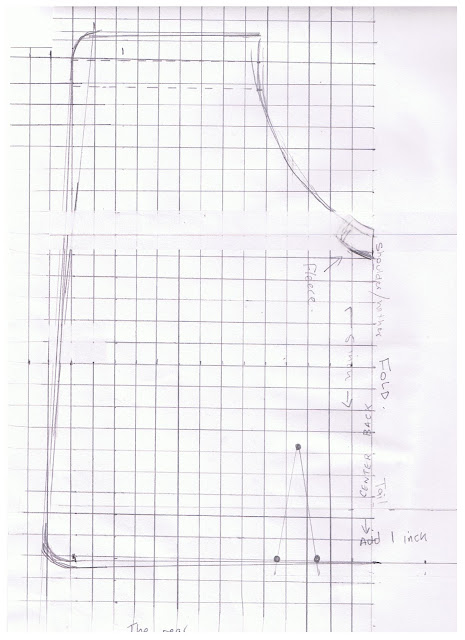
1cm x 1cm graph.
 |
| I'm guessing the rear of the blanket needs to be wider than the front because the rump darts (inside the dots) will bring the length of the back up. |
I need to get hold of some piping bias if I can in white, and some brown gross grain ribbon. These two will make up the trim on the blanket. It also looks like Phar Laps' rug has a brown surcingle. (or belly strap.)
The Beginning.
These are a few photos of my fitting in tissue paper. You can see where I began by drawing around his body shape along the center back line. |
| Don't worry about where the tissue joins I was just adding to the back. |
 |
| Here we are with the rump darts to shape over the rump. Its almost the same as folding in the ends on someones present! Then on the fabric itself you will stitch the outer edge down. |
Make sure you are REALLY careful if you go near your Breyer with pins......the last thing you want is a pin s-c-r-a-t-c-h right up the side of your precious Breyer! :)
Here is the next drawing on tissue paper. I didn't have a very good marker. But you can basically see the bottom edge where you will straighten the seam from the wider part at the back after the darts are sewn down. Don't forget to chalk all the marking points on both left and right flaps of the rug. You should be working on the wrong side of the fabric.
This Breyer Traditional measures 5 inches from the wither ( base of neck/shoulder top) to the butt of the tail. (where it joins the body on its rump.)
The Trail Run........
The fabric I'm doing the trial with is a scrap of plain old gingham.But- the fabric I was going to use with itty bitty checks must have been too old and lost tensile from over 20 years of storage- it fell to bits in the washing machine today! So I am quite disappointed! It was an old piece I was given. Remember when you make anything Breyer- "scale is important!"
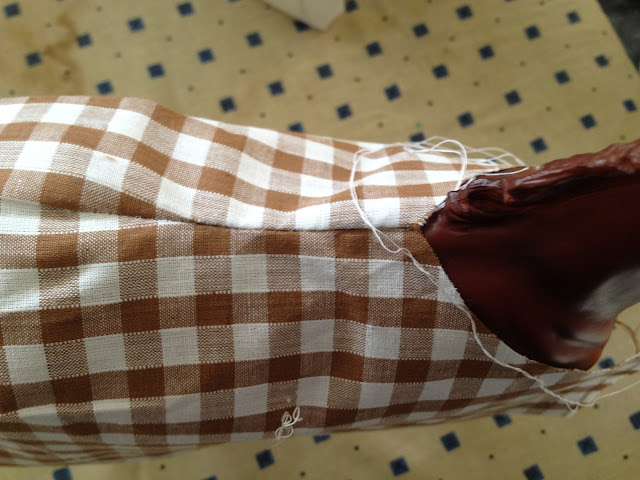
Here are a few shots of the cut out rug with the rump darts pinned. - and OMG- is that my checks matching- sorta kinda?? LOL
Don't worry about the scale of my checks on a model horse for now, this is just a prototype to see if my pattern will work.
But I am also now wondering if I should put a body shape stitch along the back because Im thinking once the surcingle is done up it will pull rather than sit neat???? hmmmm. But as I have carefully folded the rear under you will have an idea of how the final hemming will be.
If you look closely at the pin in the hip dart, you can see my blue tailors chalk dot.
With sewing machine out- which is dismally playing up- I have done the back seam, clipped the curve and ironed back. I think when I do the real thing I will put this on the outside if I decide to run a strip of brown trim down the back? As there is also the possibility doing that will make it too stiff, and not show the shape of the body to well.
And taken up the drop...this picture shows where you will even up the drop. (vertical drop down the legs- like making curtains! tee hee)
I used iron-on hemming tape because I was thinking I didn't want too much bulk to have to sew over with another line of stitches when I go to sew on the blanket trim around the edges.
D-Rings (Hardware)
The photo below is a quick shot of me playing with tie-wire and point nose pliers to make the embellishments. D rings etc. But I am starting to think what a shame the plaid wasn't smaller. |
| D ring at the back. I've never really tried doing anything like that before. |
This scrap piece of ribbon might be too wide but it gives you a general idea of how you can just play with it a bit to see how it would look.
Blanket Trim.
Here we are with some binding.....I found it very fiddly. To get the round edges I folded over a dog ear in the front bottom corner. I only had wide bias in my stash box and just quickly did a zig-zag around to move on with the prototype. If I was doing one for real I would use these a tacking stitches and then pull them out.
I just used some cotton crochet thread and super glue on the tail rope.
And...............Here we are- A full shot. Although I am still in two minds about adding a surcingle?? Over all I am very impressed with how the pattern worked.!!!! Yay!! :)
I had the chest straps too low and moved them later. But I'm amazed that where I marked the blue square on the pattern was flukeishly in the right position!
I hope you enjoyed reading my post. But from someone who really doesn't sew, and has never really done any miniature replica tack on model horses before.......if i can do it, so can you!!!! All you need is the want of trying.
"You never know until you have a go!"


